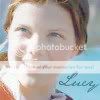
VFK's sixth tutorial in GIMP 2.6
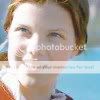
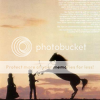
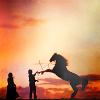
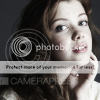
How to go from this:

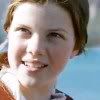
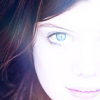
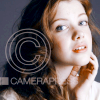
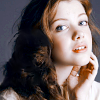
to this:
1: Take your base, duplicate it, colors>auto>white balance. Set to Screen at 100% opacity.
2: Flatten.
3: Duplicate base again, set to screen at 30% opacity.
4: Flatten.
5: Duplicate base AGAIN and go to colors>components> channel mixer and insert these settings.
Output channel:Red
Red: 120
Green: -10
Blue:20
Output Channel: Green
Red:-20
Green:120
Blue:10
Output Channel : Blue
Red:-20
Green:30
Blue:170
Check preserve Luminosity and click "ok".
Set that layer to soft light at 50%.
6: Flatten.
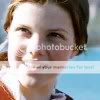
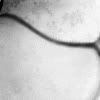
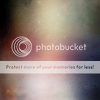
Now we're going to add a texture:
7: Add this one by me:
flip it horizontally and set it to soft light at 50% opacity.
Flatten.
8: Now you're going to duplicate the base layer and desaturate and invert it. Set that layer to overlay at 100%
9: Flatten.
10: Now, add a new transparent layer. (ctrl+shift+n) and zoom in heavily on your image. Specifically on her eyes. Using the color 0773b1 and a very small brush, paint over the iris' of her eyes. Set this transparent layer with the blue paint to color at 60% opacity. Her eyes are blue now

11: Now we're almost done. Make a new transparent layer and put a big fuzzy white dot in the middle of the image. Go to filters>blur>gausian blur and blur it with a radius of 69. Set it to screen at 50%.
12: Flatten
13: Last step I promise. Duplicate your base layer and go to colors> levels and input these settings.
Value Channel: Input Levels: 3, 1.14, 242
Output Levels: 0, 247
Red Channel:Input Levels: 47, 1.25, 255
Output Levels: 35, 232
Green Channel:Input Levels: 25, 1.23, 248
Output Levels: 11, 239
Blue Channel:Input Levels: 0, 1.83, 232
Output Levels: 100, 160
Click okay.
Set it to screen at thirty percent.
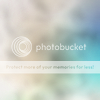
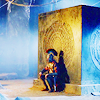
Then I added one last texture which is optional,
, blurred it as much as I possible could with the blur tool in the toolbox, rotated it ninety degrees to the right and set it on multiply at 20% ^_^.
You're done.
Go ahead and add anything anything you want, please don't copy exactly. Hope you had fun, I know I did ^_^
The only other thing I did was add text.
I can't wait to see what you guys come up with.
~VFK~

 to this
  , recreating this
  .
.
 to this
  , recreating this
  .
.


 to this:
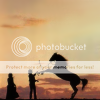
 set it to Soft Light at 100%.
 set to Soft Light at 100%.
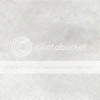 set to Soft Light at 75%.
 set to Soft Light at 100%.
 set to Lighten Only at 100%.
 set to Soft Light at 100%.
 set to Soft Light at 50%.
 set to Grain Extract at 100%. Duplicate that texture and set it to Grain Merge at 100%.
 set to Screen at 100%.
 set to Screen at 100%.
 set to Screen at 100%.
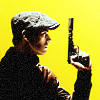

 to this:


 to this:
 to this:
 to this:
 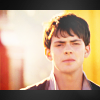 recreating this:
 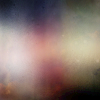 set to Soft Light at 100%.
 set to Soft Light at 50%.
 set to Lighten Only at 100%.
 set to Screen at 100%.
 to this:
 to this:
 to this:
 to this:
 to this:
 to this:
 to this:
 to this:
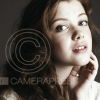


 set to Soft Light at 25%.
 set to Soft Light at 100%.